Opening your configuration
- Open the Metrics software by double clicking on the shortcut icon on your desktop.

- When the software has opened, click on the “Measure” master tab, the “Setup files” sub-tab and the dropdown icon “v” next to “Folders”.
- Locate your Metrics configuration files folder and choose your required file.
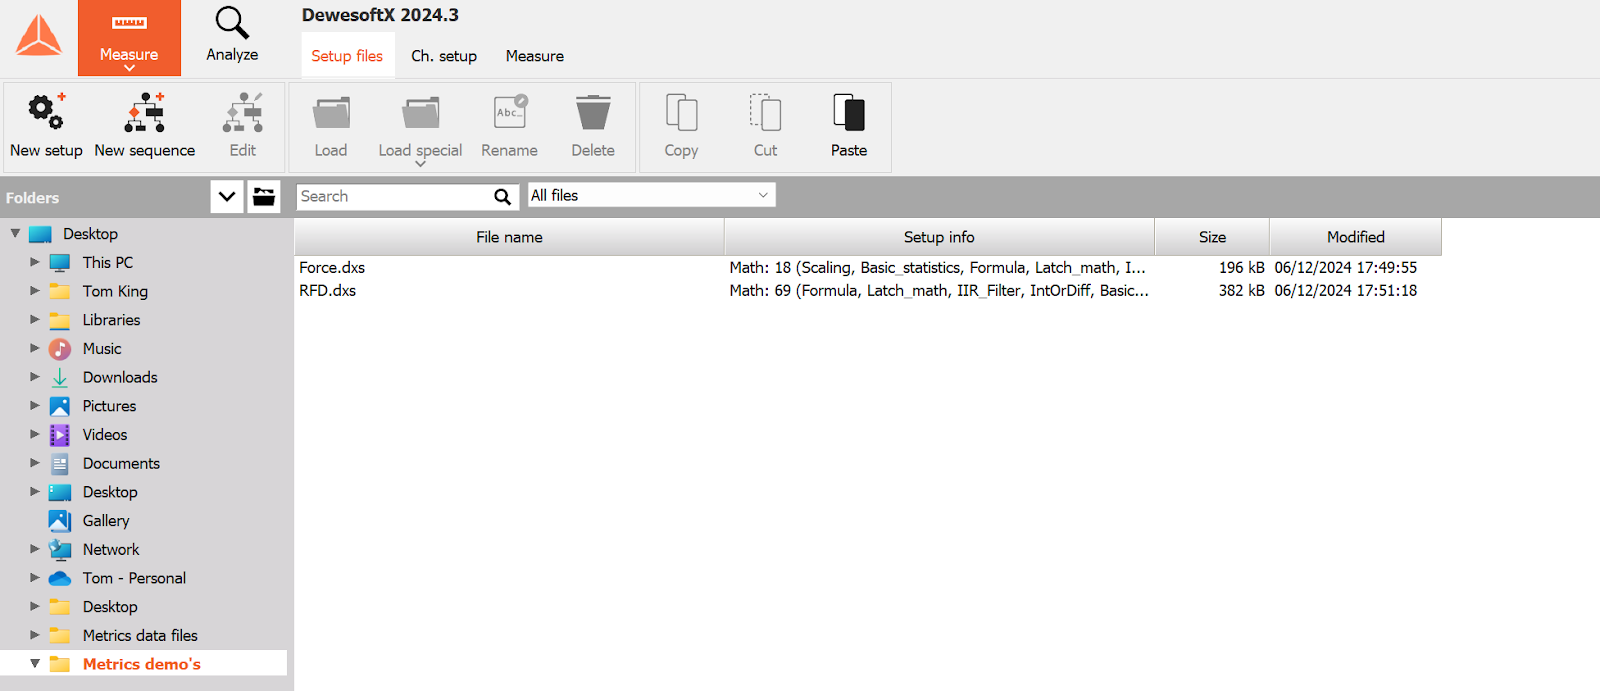
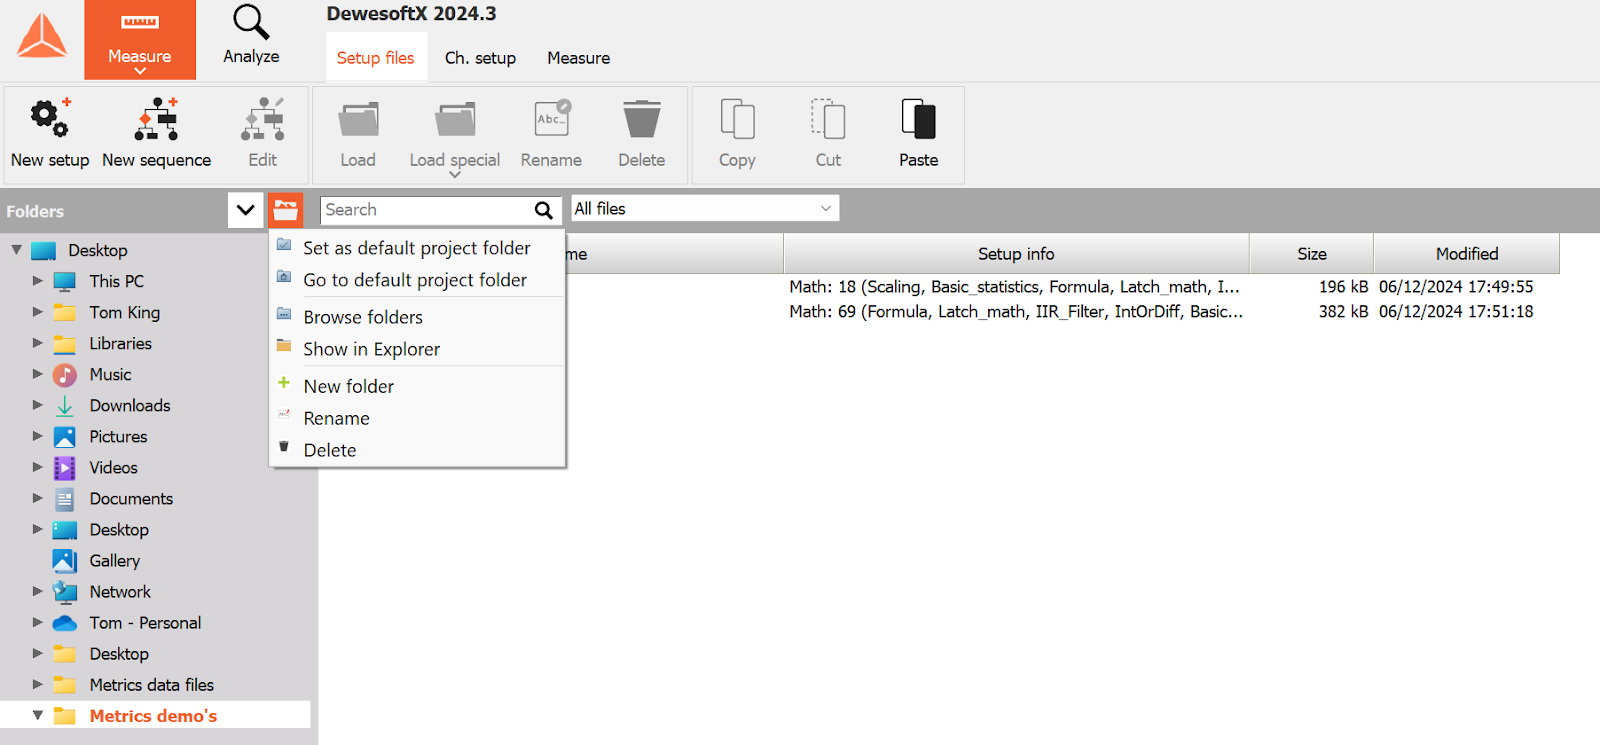
- To save this folder as the default project folder, click on the file icon next to the dropdown, and select “Set as default project folder”.
- When the configuration file has loaded, click on the “Measure” master tab and the “Measure” sub-tab underneath.

Utilising the testing and training interfaces
When inside the “Measure” sub-tab you will be presented with the live force-time graphical data and associated metrics.
Force configuration
Click here to watch a video demonstration of the Force configuration.
The “Force” configuration contains the following widgets:
- Zero button
- Body mass entry
- Elapsed time
- Live force bar chart
- Live force-time graph
- Peak force
- Relative force (force / kg)
- Allometric force (force / kg0.67)
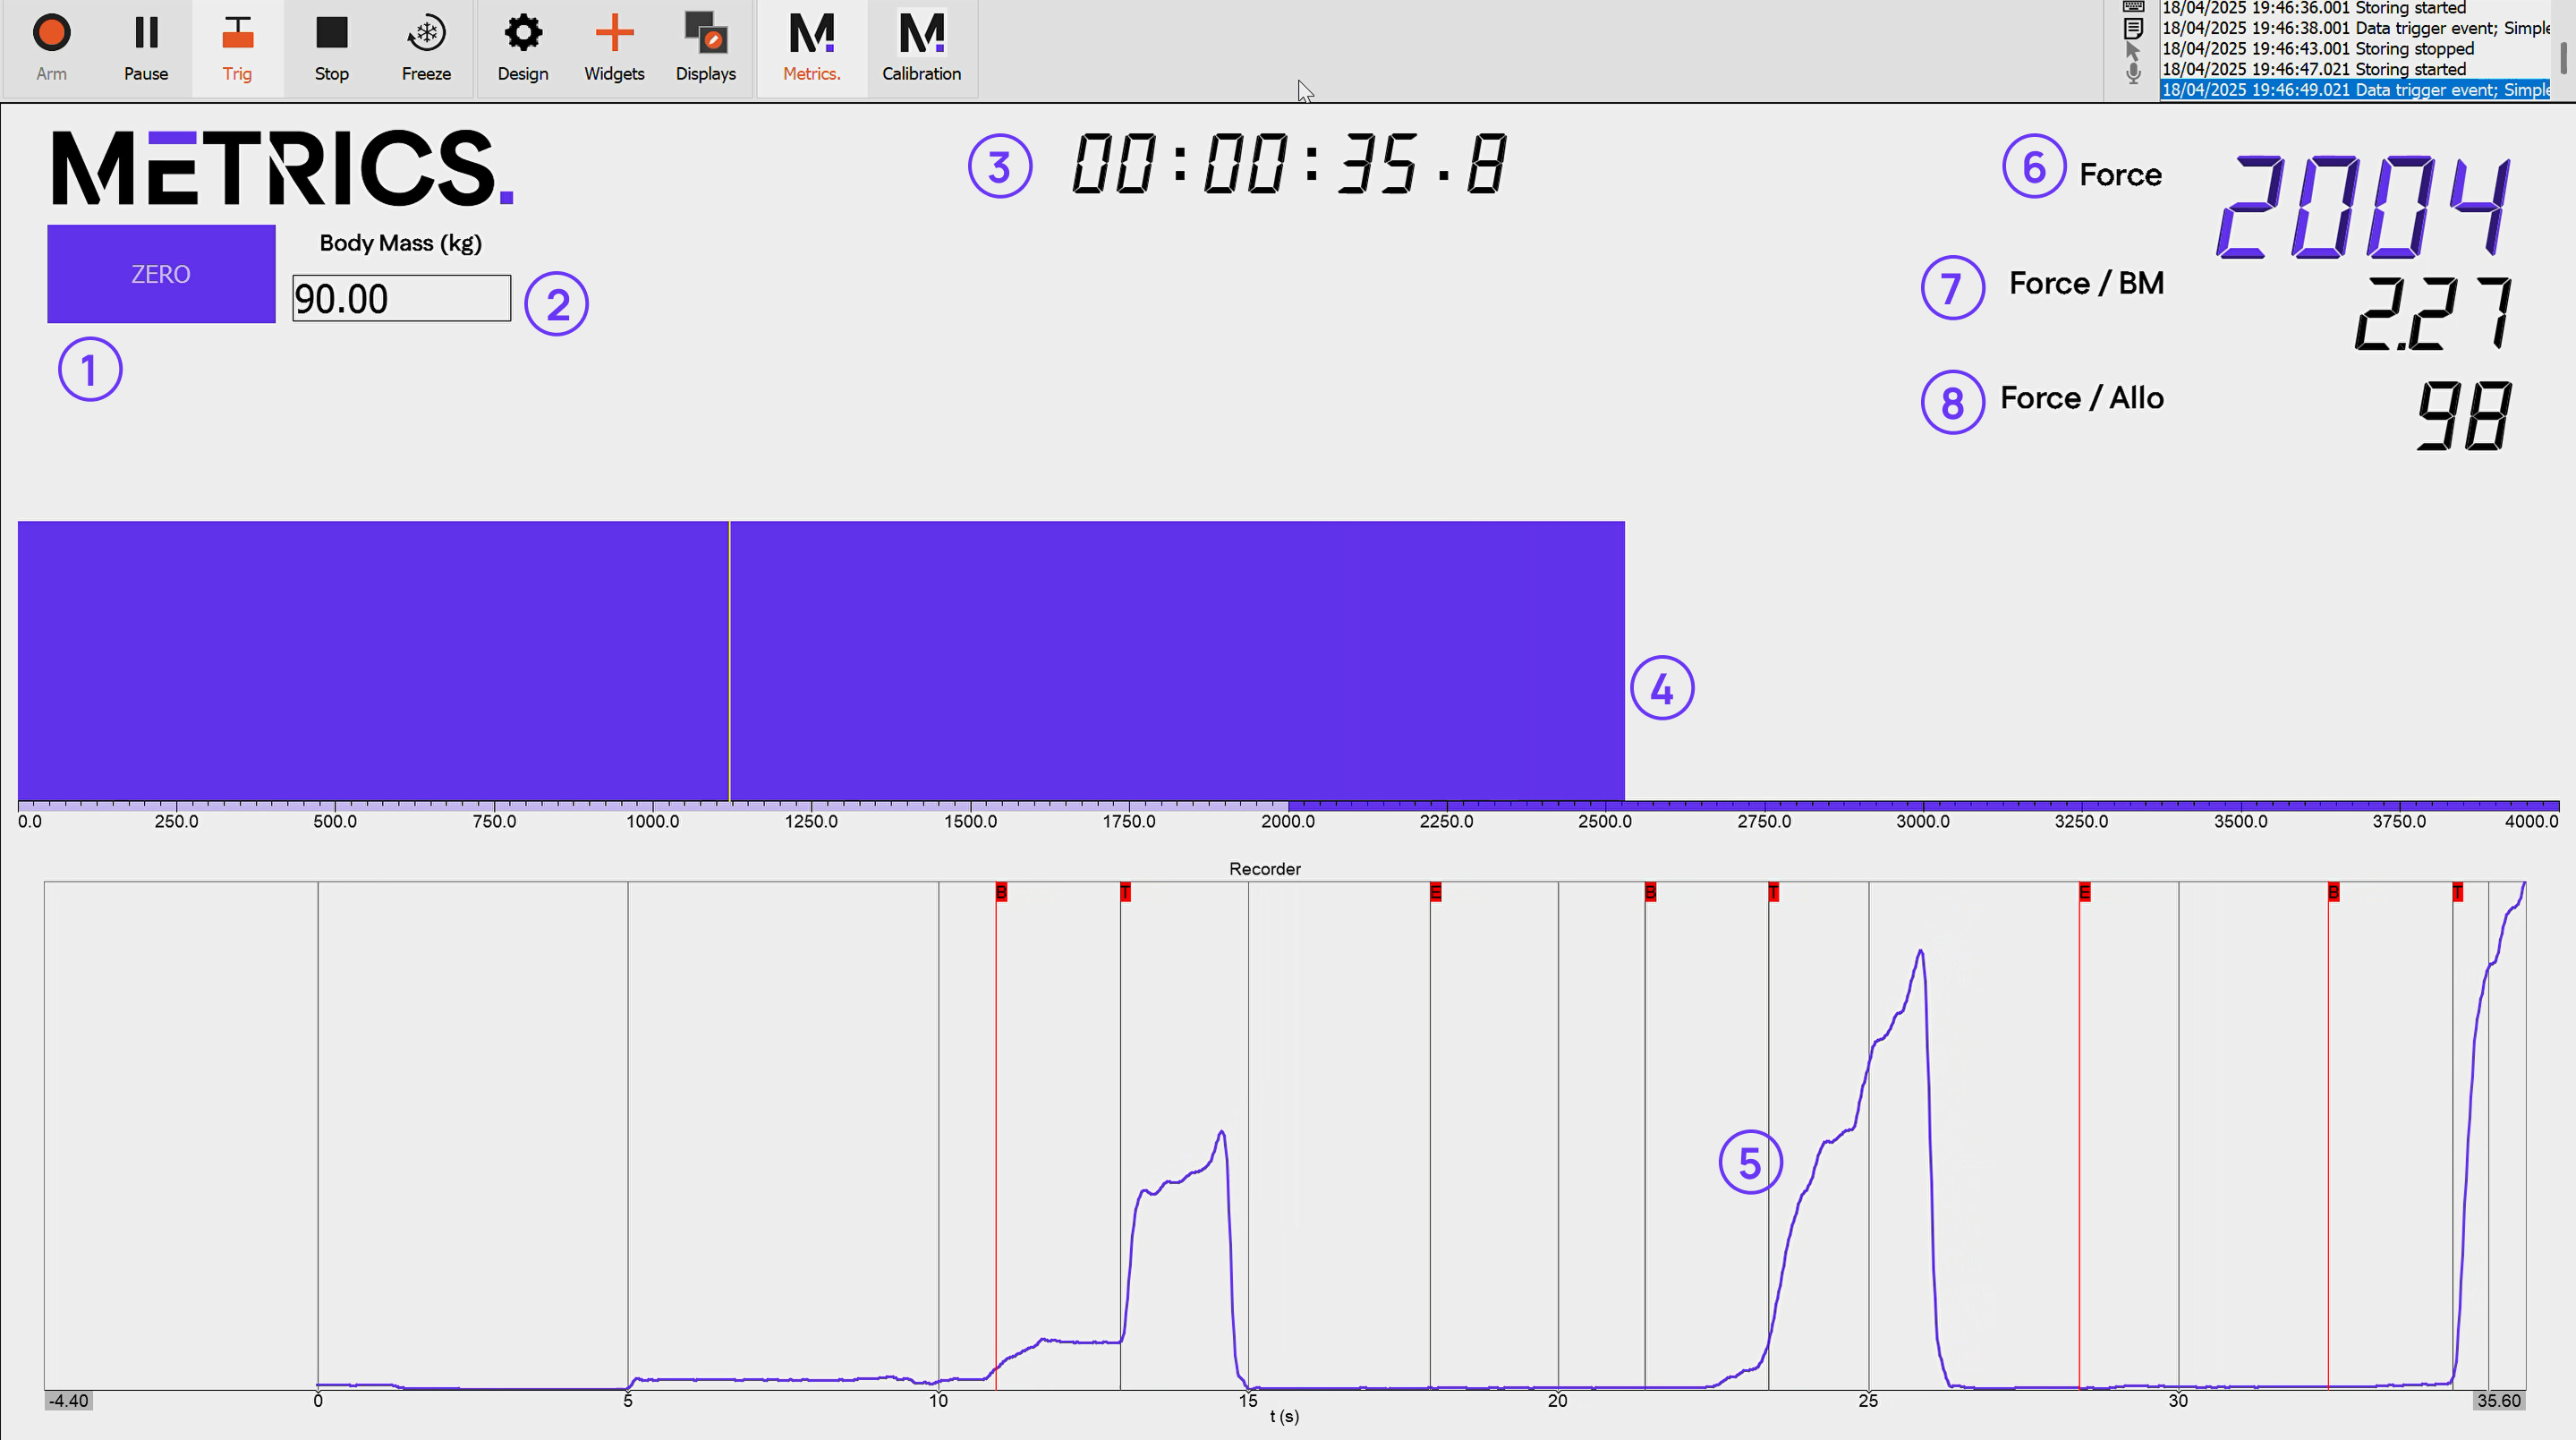
The horizontal bar widget is a useful tool to set athletes targets to meet whlist either training at specific % MVIC or completing periodic baseline testing.

To amend the thresholds in the widget, click on the widget, then click on the top left arrow to open the sidebar and amend the “Min value”, “Max value”, “upper limit” and “lower limit” cells.

RFD configuration
Click here to watch a video demonstration of the RFD configuration.
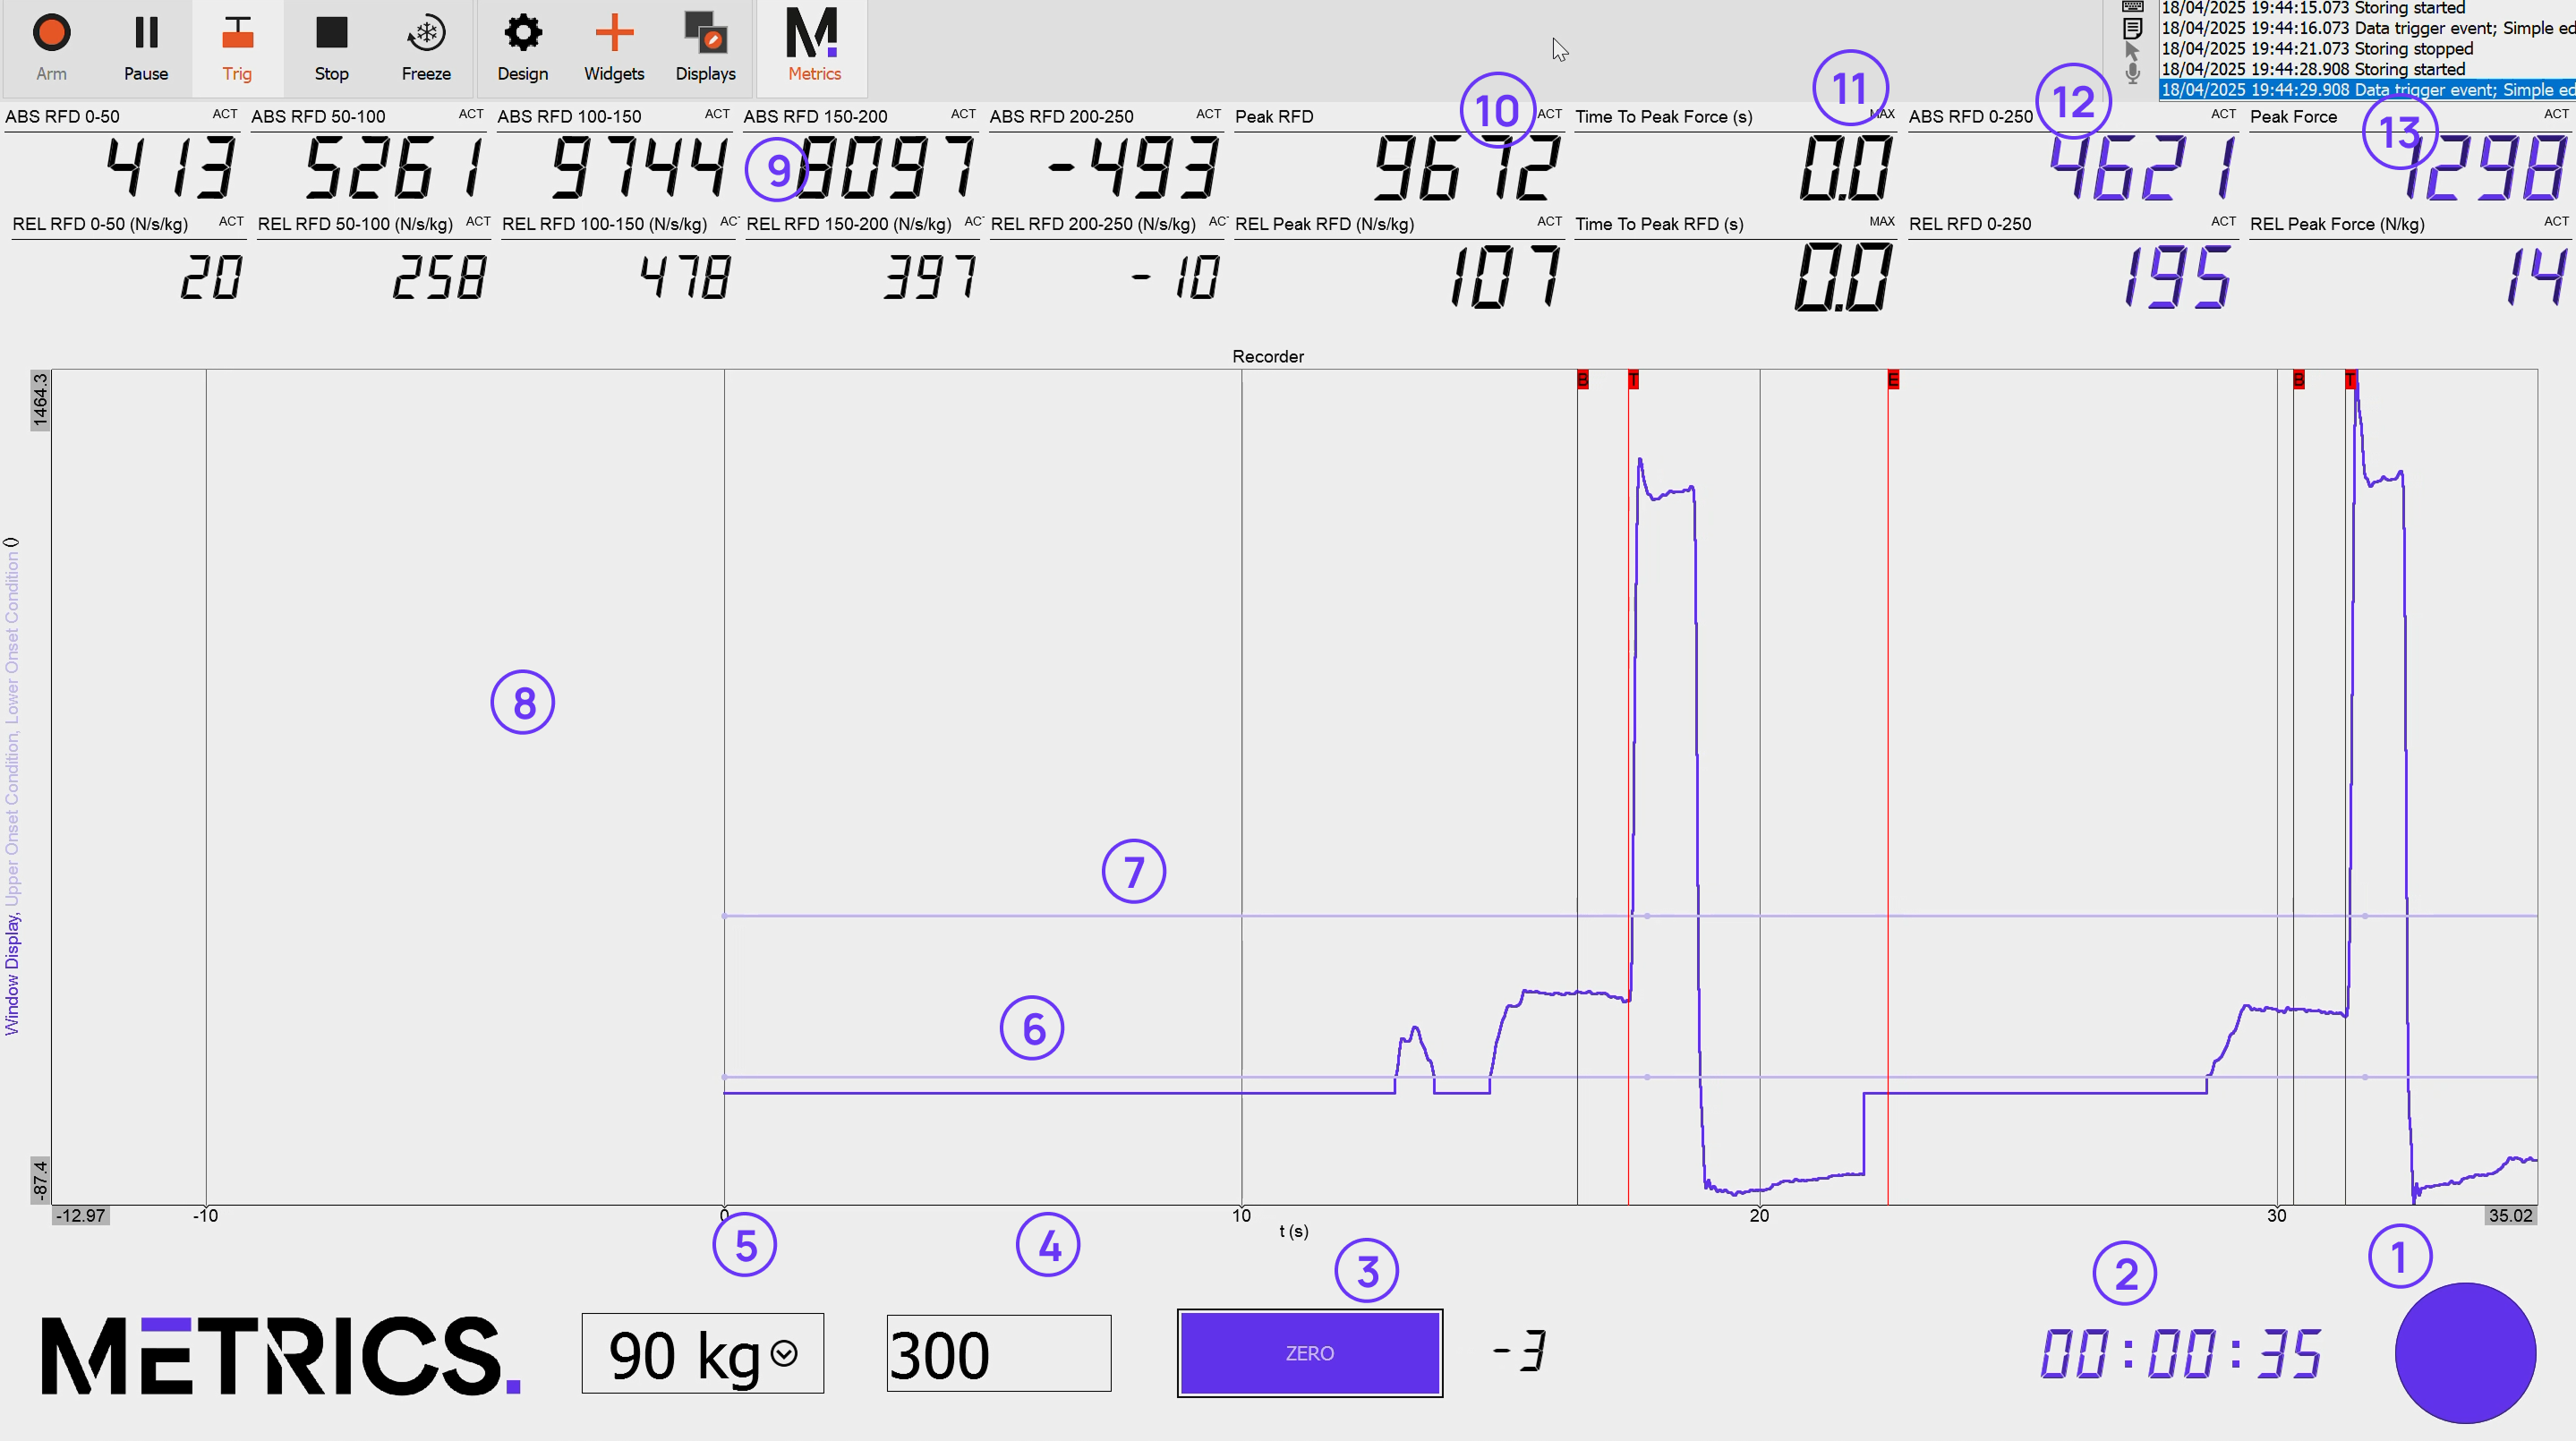
The “RFD” configuration contains series of useful widgets:
- RFD start trigger
- Timer
- Zero button
- Pre-tense zone
- Body mass
- Lower pre-tense threshold
- Upper pre-tense threshold
- Live force-time graph
- RFD across 50 ms windows
- Peak RFD
- Time to peak force
- Average RFD (0-250)
- Peak force
Choosing your data export file locations
When inside the “Measure” master tab and “Ch. setup” sub-tab click on the “Storing” sub-tab.
Click on the spanner and screwdriver icon.
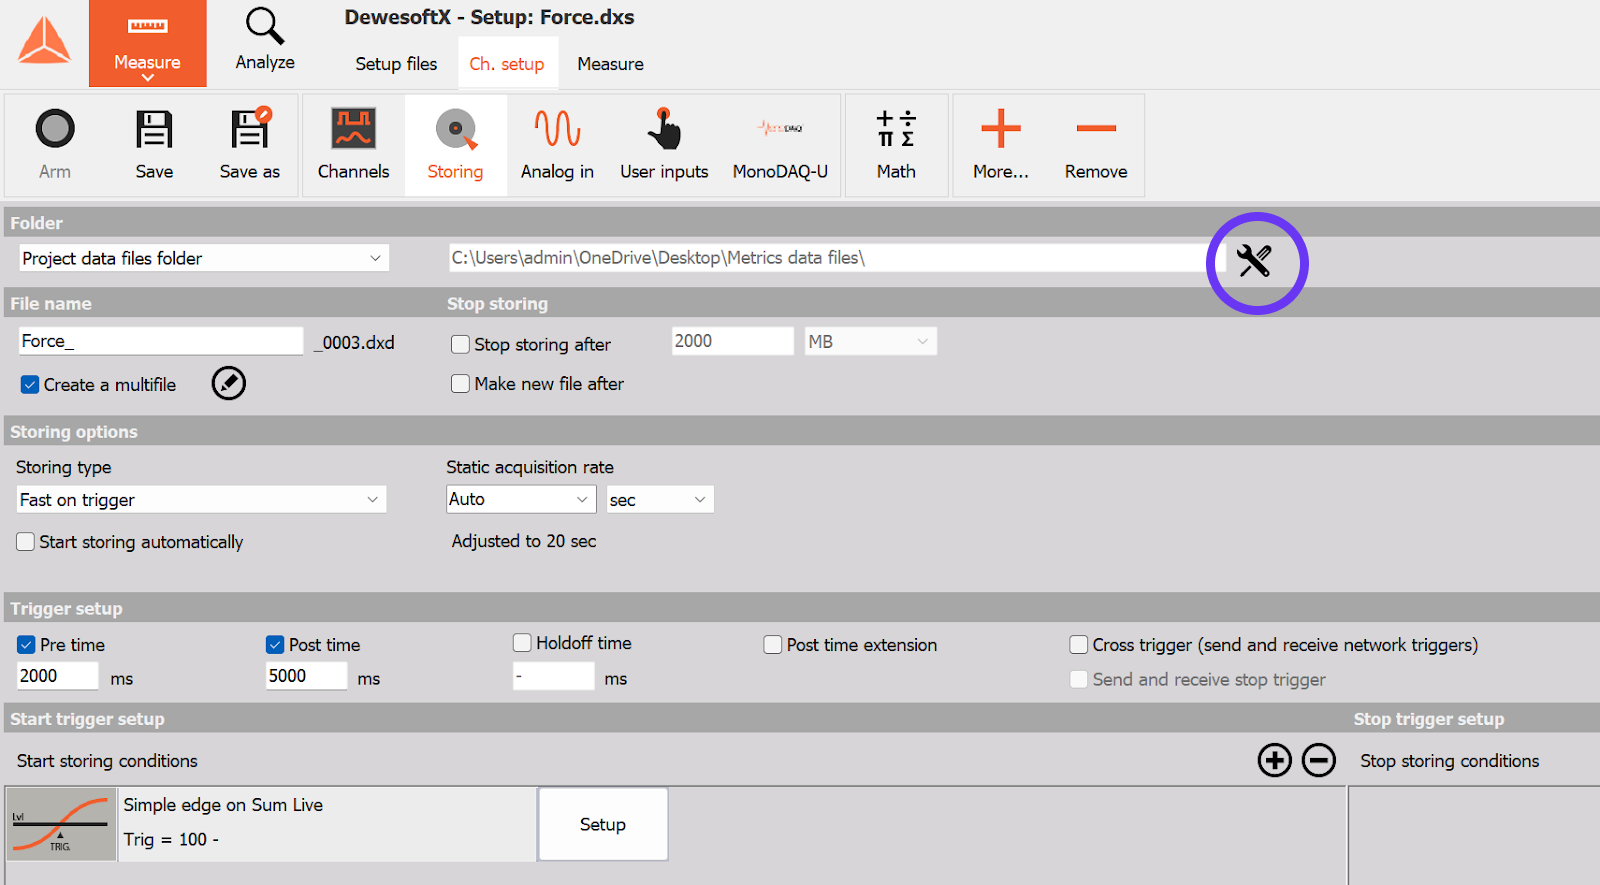
Click on the three dots on the right hand side of the “Default folder for data files” row.
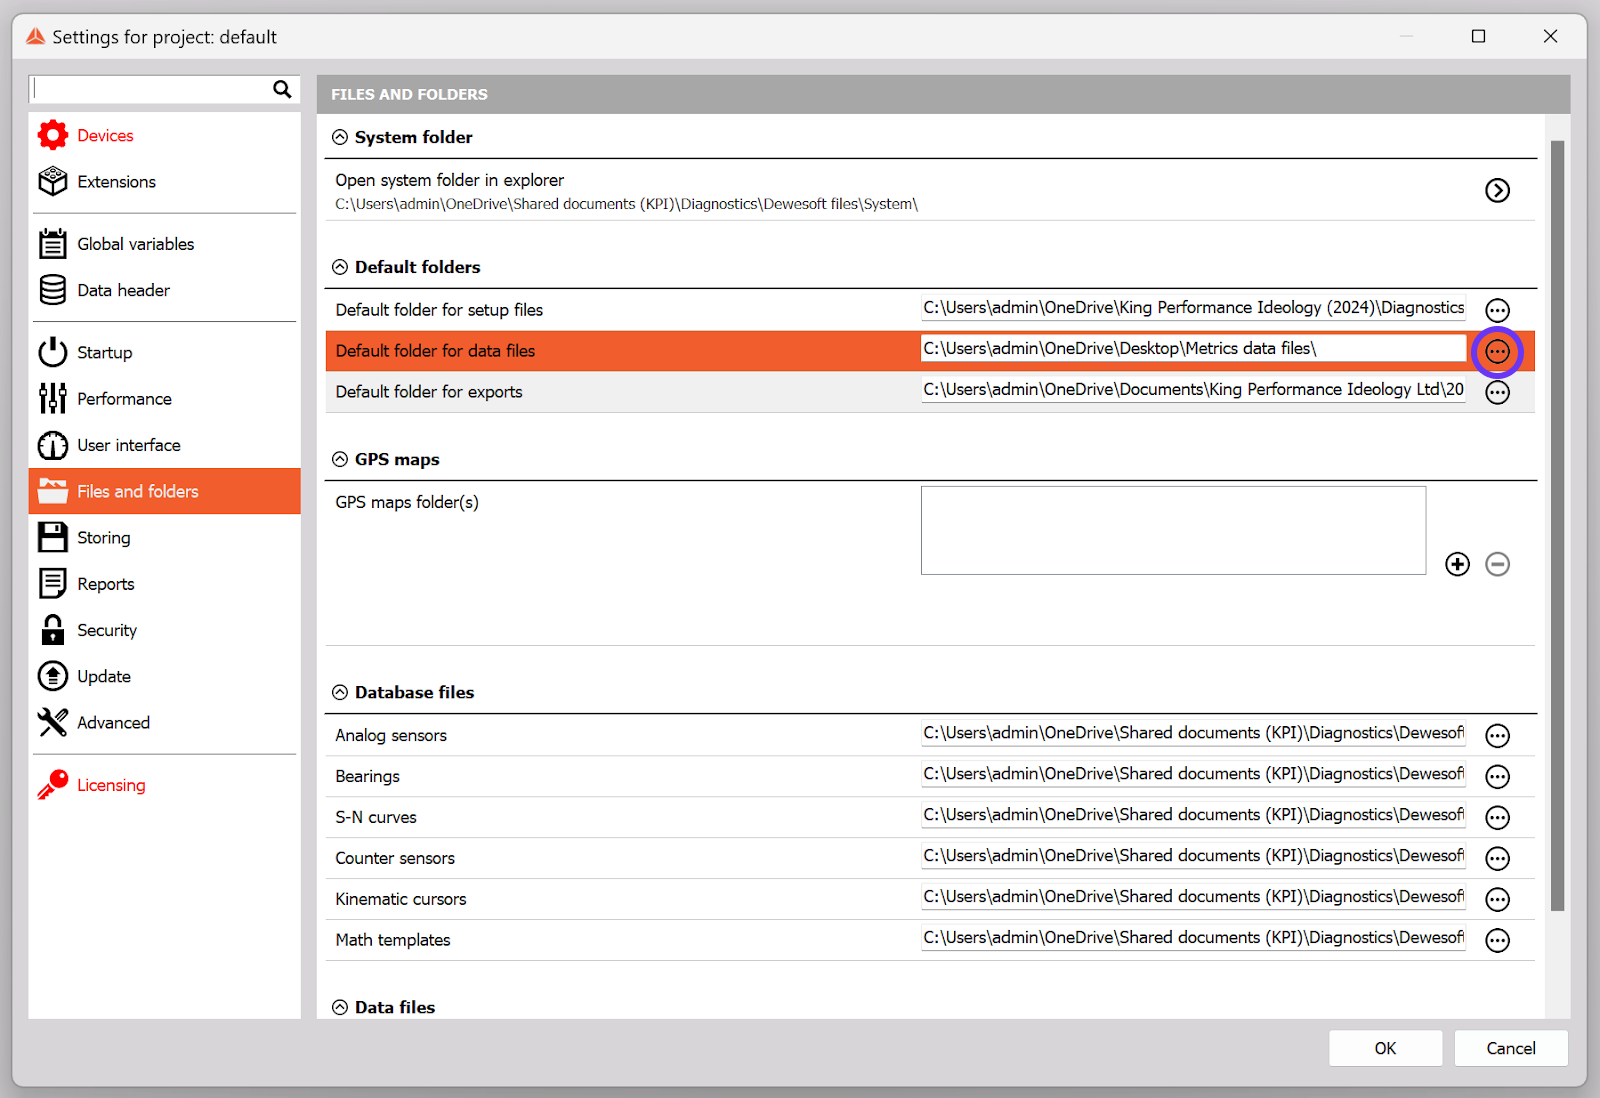
Create a folder called “Metrics data files” in a known and shared location.
To save, click ok.
Make sure you do this for both the “Force” and the “RFD” configurations.